Another Bomb-Proof Modular Shelving System
30 Sunday Sep 2012
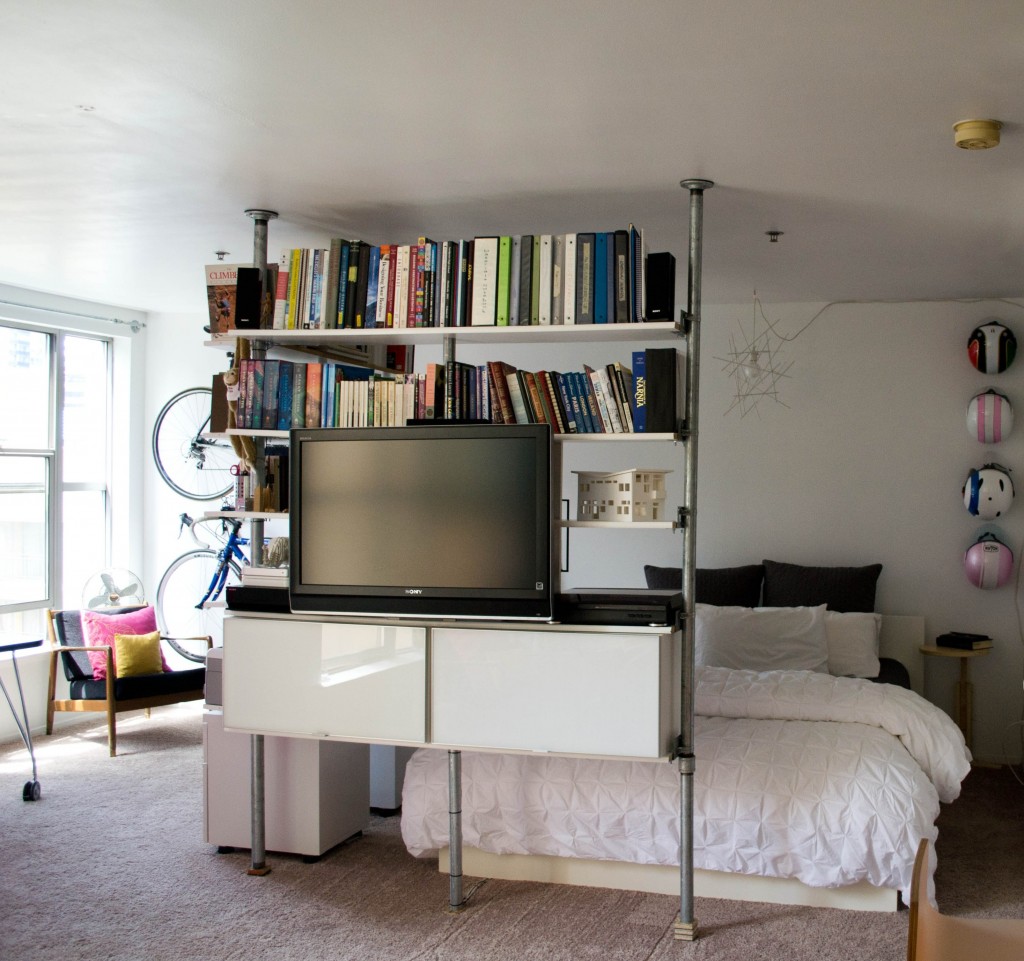
Hello Friends! This week I will be featuring a follow-up to my very first blog post — the sister piece for the Bomb-Proof Modular Shelving System. In the four years since I first built this bookshelf, I’ve moved a few times, re-arranged a few more times, and well, can basically build this damn thing in my sleep.
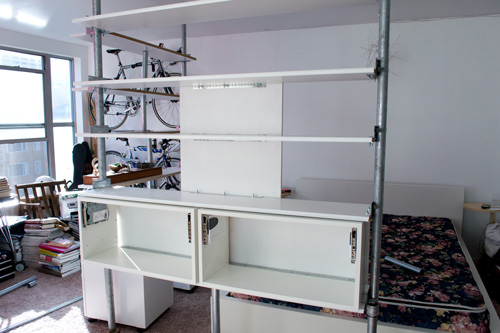
I have made a few improvements, and have now incorporated my entertainment setup into the modular system as well. I thought this iteration of the Bomb-Proof Modular Shelving System would be worthwhile because I now have a pretty kick-ass room divider, and it is not so easy as you might think to wrap your head around how all these pieces fit together. So without further adieu…
Tool Belt:
- A Buddy
- Screw Gun
- Drill Bits
- Crescent Wrench (and one for your friend)
- Hammer
- Level
- Skil Saw
- Clamps
- Hack Saw with a blade to cut pipe
- Foam Sanding Block (to sand down any rough edges on the OSB, not needed for Melamine)
- Hand Plane
Required Available Funds:
- 5 Shelf Ceiling Anchor (melamine): $650.00
- 5 Shelf Ceiling Anchor (osb): $580.00
Prices exclude cost of TV bracket
Shopping List:
- 3 1 ¼“x10’ Galvanized Plumbing Pipes (have these cut and rethreaded to about 1 1/2″ shorter than your ceiling height)
- 2 1 5/8“x8’ Aluminum Fence Post
- 3 1 ¼” Galvanized Plumbing Flanges
- 10 1 ¼” Electrical Conduit Strap
- 10 Adjustable Wood Adapter Fence Clamp*
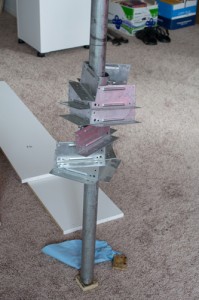
- 5 Corner Wood Adapter Fence Brackets (see photo)*
- 2 4’x8’x3/4″ OSB OR 8- 8’x11 ¼“x3/4″ Melamine Shelves (aesthetic is totally up to you – use OSB for a more industrial look, and melamine for a cleaner minimalist look)
- 1 2’x4’ Sheet Finish Grade 18mm plywood
- 1 Sheet Masonite
- 1 Can of paint in the color of your choice — I chose white to match the melamine shelves and cabinets
- 2 15“x30“x12” IKEA Cabinets — I chose white boxes to match the melamine shelves
- 2 15“x30” IKEA Cabinet Door Fronts
- 1 TV mounting bracket with articulating arm (make sure it is rated for your TV size)
- 2 6′ sticks of holed angle stock
- 1 Package Pain in the Ass Melamine Iron-on Side Stripping (not needed for OSB)
- 1 Roll of mass-loaded vinyl or a yoga mat you can spare
- 5 2″ bolts to fit the threads in the corner fence brackets — I just tested the size at the store to be sure
- 1 Box #10 Pan-head Sheet Metal Screws
- 1 Box 1 1/4″ x1/4″ Carriage bolts
- 1 Box Nuts to fit carriage bolts
- 6 Lag Screws (or some other bomb proof method of anchoring these to the wall, this will depend on what your house is built of, just make sure the screws fit through the holes in the flanges)
- 5 2“x2“x3/4″ Wooden Blocks to support the 1 1/4″ galvanized pipe**
* Can be found in the aluminum fencing section of Home Depot
** I cut mine out of some scrap OSB – they hardly show, so they don’t have to be fancy style.
Get Down to It:
Now that you’ve acquired all of the necessary goods to produce this modern wonder of shelving excellence, it’s time to get down to business.
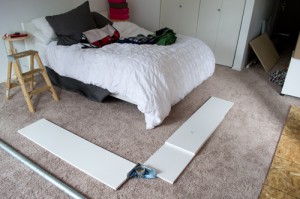
Step 1: Layout where you want your shelving system to go, and what size you want your shelves to be. As you’ve purchased 8′ melamine shelves, you are pretty flexible in sizing — however, before you get too crazy, let me point out that you probably do not want to exceed a 5’6 length on either branch. Melamine shelves are pretty rad, but they are kind of wimpy when it comes to tensile strength — even if you put a middle support in like I did.
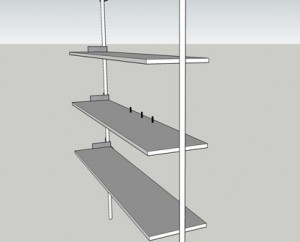
Once you determine your lengths, cut one shelf down for each side of the book case and lay them out on the floor. This is a very important step, because it will determine where your support pipes go.
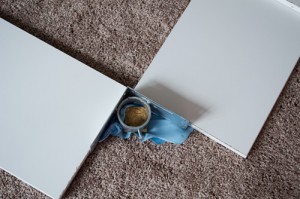
Between the shelves, you want the pipe to be at the rear corner (as shown here) — at the other end, you want the pipes centered on the shelves
Step 2: Get the pipes up. Now that you have a rough idea of where you want this bad boy to go, you can start marking out where the galvanized flanges will go. Remember though, that on either end of the bookshelf you want the pipe to be centered on the shelf, but in the corner between the two shelves, you want the bracket to be in the rear corner. It helped me to put the bracket in there when I laid everything out.
No comes one of the hardest parts — make sure your shelves are square in the room. This was difficult for me to do because the walls in my apartment were so out of square that I had to just eye ball it. Another little snarl in the plan is that you cannot simply align the pipes as one is centered on the shelf and one is at the rear corner. Do the best you can and then mark where you need to drill holes to hold the flange to the ceiling.
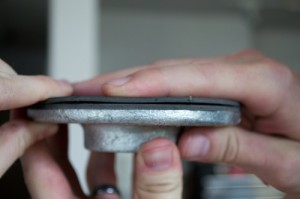
Step 3: Ready the mass-loaded vinyl. After installing this bookshelf a few times, I have learned that the yoga mat or mass-loaded vinyl will do wonders for protecting your ceiling from getting all scuffed up from the galvanized flanges. Trace the flanges onto your material of choice and cut out a few layers. Sandwich these between the flange and ceiling for a scuff-free installation.
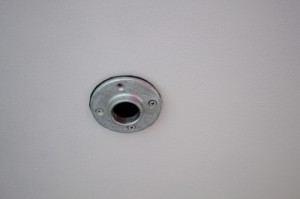
Step 4: Screw down the flange. Now that you have your gaskets cut out, and your holes strategically marked, screw all 3 flanges to the ceiling. You should only need 2 screws per flange, as the weight of the bookshelf will be held in place through tension. The purpose of the screws is simply to hold the flange in place while you screw in the pipes, and offset the chance of the flanges being able to move to and fro on the ceiling — highly unlikely, but we are being careful, right?
Step 5: Erect your pipes. Sorry, you know I can’t help an obvious inuendo… This is pretty self explanatory — line up the threads and screw the pipes into the flanges. However, if you’re a dumb-ass like me, you will probably forget to put the brackets onto the center pipe prior to screwing it in — so go ahead and do that now.
Step 6: Start installing the shelves. It’s just that simple right? Actually no. This is the most time consuming step of the entire process because you need to make sure your shelves are spaced correctly, and all of the brackets are level with one another. Save yourself some trouble and be sure that you have a space between two of your shelves that is tall enough for your cabinets to fit between! For more detail on this step, check out the previous post (steps 4–5). However, before you run away to the old post, let me note that with this shelving system, I developed a new way of attaching the shelves to the brackets that is much more stable.
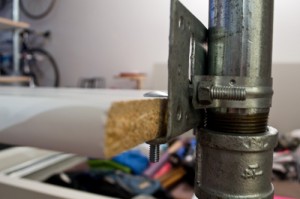
Using carriage bolts to attach the shelves to the brackets results in a truly bomb-proof connection.
Get your brackets tightened into roughly the correct location and then set your shelves on them. Mark the holes from the bracket onto the shelf and then drill out the shelves with a big enough bit to fit your carriage bolts through the holes. Once you have all of your holes drilled, simply bolt the shelves onto the brackets as shown in the photo. This works much better than the previous method of connecting the shelves to the brackets because it limits the amount of front to back wobble on each shelf — very important when one is bolting a TV to the shelves…
Step 7: Assemble your IKEA cabinets. Now would be the time to assemble those cabinet boxes. Follow the delightfully pictorial instructions all the way up to the point of attaching the backing to the cabinet. We will not be doing that as we will create our own backing.
Step 8: Don’t forget this step! I did and it was a HUGE pain in the ass because I had to take everything apart later. This step involves placing the first structural supports for the TV mounting board. You will need to cut down your angle stock so you have three pieces that are approximately as wide as your TV mounting board (the 2’x4’ finish grade plywood). After cutting, we decided to spray paint the angle stock white so it would blend in with the shelves. After you have your cut and painted angle stock, mark the holes on your shelf so you know where to drill for the three carriage bolts.
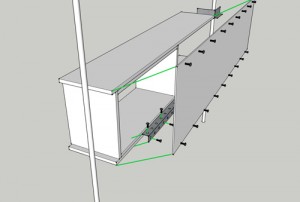
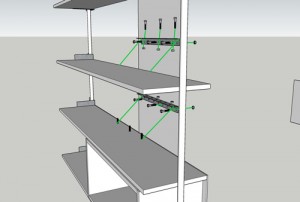
This gets a little confusing to verbally explain, so I’ve drawn a little SketchUp model to illustrate how all of this goes together, but for the purpose of being thorough, I will attempt to explain our layout as well. We have essentially 3 shelves that are affected by the TV backboard as we put our cabinets on the bottom level of our shelving system. As you can see in later steps, we have three pieces of angle stock attached to three different shelves, spreading around the weight of the TV mounting board.
The step I forgot, and that you need to do now, was to put in the three bolts for the bottom most support before installing the cabinets. As shown in the image from the model, you need to have bolts facing upward through the shelf so that you can still slide the cabinets in underneath the bolt heads. As for location, we centered our angle stock because, as I mentioned previously, we centered our TV on the shelving system.
Now grab your TV mounting board and align the bottom of the board to the bottom of the lowest shelf. Mark where you need to drill the holes to attach the angle stock now, because you won’t be able to after we put the masonite backer on the cabinets.
Step 9: Install the cabinets. Now is the time to take your cabinet boxes and slide them between your two chosen shelves. You want to make sure the back of the cabinet box is flush to the back side of the shelf — if it protrudes at all, you won’t be able to put on your piece of masonite cabinet backer.
Once your cabinets are flush, you need to secure their location using some angle stock. Cut two more pieces that will fit into the width of the cabinet — they don’t have to go the entire width, but should give a good spread for the three attachment screws. Go ahead and spray paint the angle stock if you want to (though these pieces will only show if you open the cabinets, so not completely necessary).
Attach the cabinets to the shelves — I used my sheet metal screws and washers for this step. For each cabinet, screw three screws with washers down through the top of the angle stock into the bottom of the cabinet box and three screws with washers through the angle stock into the back of the shelf. Once you get those tight and make sure the shelf running across the top of the cabinets is snugged down, your cabinets will not be going anywhere anytime soon.
Step 10: Install the masonite backer. This step had me a little stumped for awhile, but luckily my husband is a connoisseur of antique hand planes so we were able to solve our conundrum. After we got both cabinets installed, the question was how to get a sheet of masonite backer to fit our slightly less than perfect shelf profile. To do this, we cut down our masonite to slightly larger than the span between the two shelves that sandwich the cabinets. Then we traced along the top of the top shelf and the bottom of the bottom shelf and cut it down. This got us pretty close, so we painted the masonite white and got ready to install it.
As shown in the image for Step 9, we used several of our metal screws to attach the masonite to the back of the shelves. Then came my husband’s great joy when he was able to justify carting around several antique handplanes for the last eight years and plan the top and bottom of the masonite to the exact size of the shelves. After we touched up the newly planed edges of the masonite with some paint, the result was fantastic!
Step 11: Prepare the TV mounting board. Since you already have the bolts for one of your TV mounting board brackets installed, it should be a piece of cake to do the other two. In the same horizontal location on the other two shelves, drill your holes for the mounting brackets. The only difference for the other two shelves is that the carriage bolts will face down instead of up since there isn’t a cabinet underneath.
Once you get your shelf holes drilled, go ahead and loosely fasten the brackets to the shelves so you can mark where you need to drill the holes in the mounting board for the upper two shelves.
A helpful tip — Since you have already drilled the holes for the bottom shelf, go ahead and attach the mounting board to the lowest shelf. This will ensure that your mounting board holes for the top two shelves are in the right place.
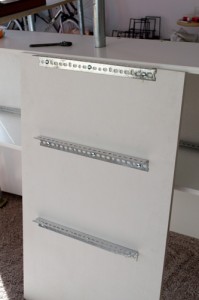
Now undo the brackets that you loosely fastened to the shelves, and use your carriage bolts to attach the brackets to the mounting board as shown in the photo.
Step 12: Install the TV mounting board. Since everything is all pre-drilled, this step is pretty simple. Just tighten the carriage bolts for al three shelves!
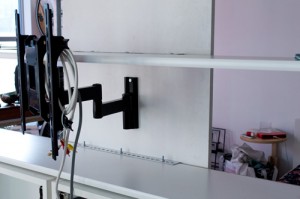
Step 13: Install the TV bracket. This step will be slightly different because each TV bracket will have it’s own set of instructions for mounting. Though I can offer two pieces of advice:
One — Mount the bracket to the back of the TV first and hold it in place so you know exactly where to drill the holes for the mounting hardware. After all this, you want to make sure your TV is at the optimal height for both viewing and overall shelving system aesthetics.
Two: Remember to put your support pipes back in before you mount the TV. The entire weight of the TV is being transferred down into each of the three shelves, so they will promptly turn into matchsticks (and your TV into a nice paperweight) if you forget the center supports!
Step 14: Go get a pint! If you have survived all the way to Step 14, you have earned a pint (or a nice, um, glass of sparkling cider if you’re not into that sort of thing). I know that this project tested both my commitment to my idea, my ability to think through problems on my toes, and also my wonderful husband’s commitment to go along with it when I say I have a fantastic idea, but it’s just going to take a few hours on a Saturday…
This fantastic piece has been standing strong in our apartment for 4 months now, and remains just as bomb-proof as the day it went up. Not to mention all of our friends think we’re design geniuses when they see it.
That’s all (yes, all 2600 words of it) I have for this week. I hope you enjoyed the results of this project as much as I do. Thanks for reading and feel free to share, just please give me credit for my work when you do. Cheers till next time!

