How to Make a Mid-Century Inspired Kindle Case
18 Sunday Mar 2012
 Since the beginning of my mental enslavement to the Kindle, I have spared no expense to my preoccupation. Rearranging the living room to invite a more readerly atmosphere? No problem. Purchasing new cabinetry to accommodate said rearrangement? You got it. Spending $45 on a name brand leather case to house my object of obsession? Who wouldn’t? Unfortunately, I have learned that all designers do not take the endearment of the Kindle as seriously as they should and will prey upon junkies of the written word with reckless abandon.
Who might these villainous so-called designers be? None other than the leather casegoods division at Amazon. After a mere six months of use, my lovingly purchased Kindle case fell apart due to faulty design. So what is a creative individual do? Show those bastages who has the superior mind and create something better, which is precisely what I did.
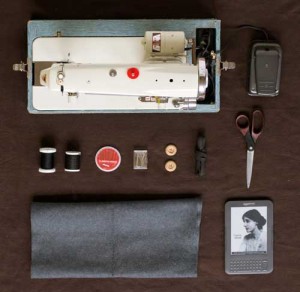
Tool Belt:
- Sewing Machine
- Skills to use sewing machine
- Scissors
- Needle
- Pins
Required Available Funds:
- $15.00
Shopping List:
- 1 Yard of felt — go for a good mid-century color (brown, grey, olive green…)
- 2 Buttons — again, mid-century aesthetic is key, I chose wooden, but there is a wealth of awesome buttons out there, so have fun!
- 1 Package of elastic, thinner is better, but I used some thicker stuff I had on hand
- 1 Spool of thread, in a coordinating color to your felt
Get down to it:
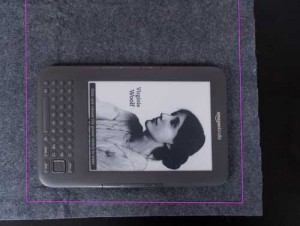
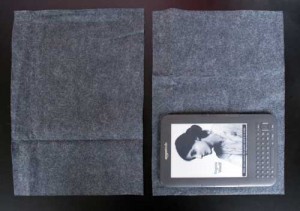
Step 1: Measure out the fabric. Rather than list specific dimensions, I find it easier to just use the Kindle as a size reference. As referenced in Exhibit A, I measured out about a half inch on both sides and the bottom. To figure out the height of the rectangle, I folded the fabric about so that it left about 3/4 of an inch to the top of the Kindle (confused? Check out Exhibit C to see what I’m talking about), and then folded some of the fabric over the top of the kindle to the length I wanted the top flap to overlap on the pouch.
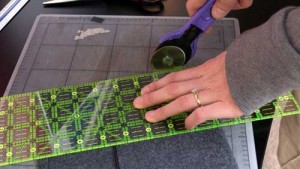
Step 2: Cut it Out. Once you have the dimension for your fabric, cut two of them out. I suppose you could do a single layer pouch, but I prefer two just to add that extra bit of cushion to protect my beloved Kindle.
Step 3: Stitch it. I do not have a photo of this step because I was an idiot and didn’t do it. However, that is why you are reading this, to avoid making the same mistakes as this poor sap. So anyway, you will want to run a stitch across the bottom of the rectangle. If you refer to Exhibit B, you will want to stack the two pieces of felt and then stitch right under where the Kindle is placed in the image. Once you have the seam, trim up the bottom edge so it’s not all ghetto with mismatched lengths of fabric.
Step 4: Measure Twice, Stitch Once. Lay out the fabric and place your Kindle in the middle. Now that you’ve evened up the bottom seam, fold it up so about 3/4 of an inch of the Kindle is showing, then pin it on the sides so you know where it is supposed to fold when you bust out the heavy machinery.
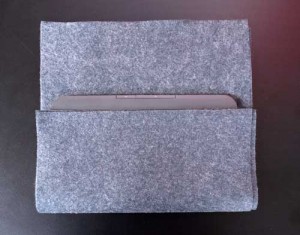
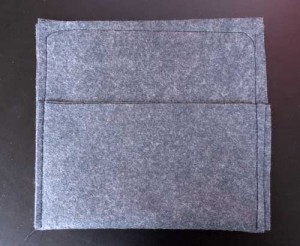
Step 5: Don’t be a dumbass. As this is the tricky part of making the pouch, I will point out all the mistakes that I made in hopes of diverting my faithful readers from doing the same. As is clearly evidenced in Exhibit D, there is really only one seam that runs around the perimeter of the pouch, but before you run off and sew it all up, you need to just chill for a minute.
Before you stitch, you need to lay out the fastening loops (you’ll notice there are no photos, because I didn’t do this correctly either). Cut two small loops of the elastic cord, big enough to go around the buttons, but small enough to close it up snug. Pin the elastic between the two pieces of fabric at the top, and make sure that they protrude from the fabric the same distance or else your pouch will look stupid.
Once you get the elastic pinned, then, by all means, stitch away. When you are sewing, make the stitches as square as possible (you’ll notice that I suck at sewing so my seams are super crooked and look like crap). Remember that you will be trimming off the excess ghetto bits, so focus more on making the seams square with the bottom and middle flap edges of the pouch. I also like to make seam at the top corners rounded, and do a double track stitch over the elastic loops to ensure that they are secure.
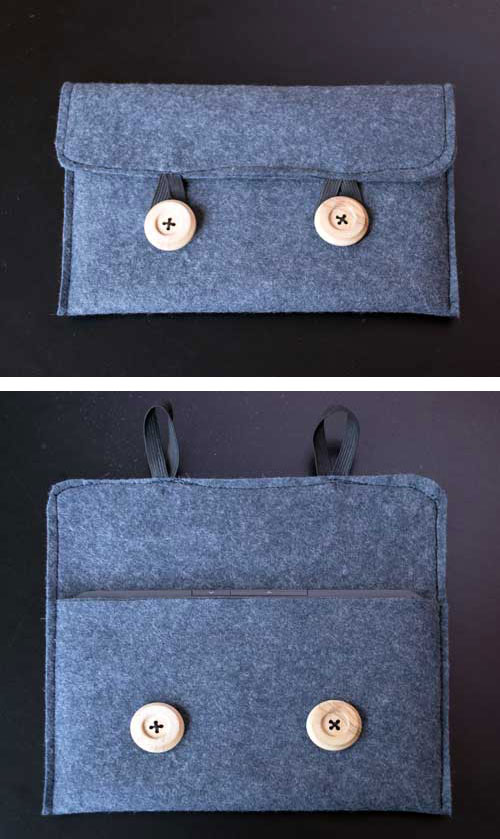
Step 6: Trim off the crappy part. This is pretty self explanatory. As you are already an experience crap trimmer from Step 3, just use your newly acquired skills to do the same on the remaining three edges. You’ll note in the finished photos that I cut the top corners into rounded shapes to match the rounded seams. It looks quite fetching when done right.
Step 7: Button it up. You’re nearly finished, all you have to do is sew on the buttons. Put the Kindle inside the pouch and fold the top flap over. Locate the buttons based on where the loops hit the lower portion of the pouch. Make absolutely sure that the buttons are level with one another, and the bottom of pouch. I didn’t make absolutely sure and it looked ultra-mega terrible, requiring me to re-sew the buttons. Sewing buttons sucks, so just do it right the first time.
Step 8: Make fun of all your Kindle toting pals. Now that you have a far superior Kindle case, go make fun of all your friends who have the lame ass Amazon Kindle cover that will inevitably fail within six months! Thanks for reading — as always, please feel free to share my work, just please give me credit when you do. Cheers until next time!

